
Headliner ~ Double Thick Padding


Oscar has been making show quality seat covers and Headliners
for CCOT's top restoration FJ40s since 1993.
This is not your Generic Perforated headliner material with a thin foam backing that shows every flaw in your Hardtop surface, but rather a Custom laminated headliner with a high density double thick foam backing. Our headliner material is much easier to work, more forgiving and delivers a smoother concealing finish than ever possible with thinner foam backing.
CCOT's exclusive headliner is Custom made for CCOT with a double thick high density foam insulation designed to lay down smooth and conceal hardtop flaws.
Our new headliner material was designed by CCOT's #1 installer who understands the special headliner requirements needed to conceal the aging surface conditions of FJ40 hardtops. Mr. Neill has installed at least 100 FJ40 headliners through the years at CCOT and helped design the perfect headliner to conceal surface gouges and digs that would otherwise show through the thinner less dense headliner material.
Our headliner is easily installed by the average do-it-yourselfer. CCOT's Perforated Headliner is Cut Slightly oversized to allow forgiveness in case you install Headliner a little off center. If Headliner was not cut slightly oversized, then 9 out of 10 Installations would be short on one side. Trim excess material away like overhanging pie crust.
See Headliner installation instructions, below.
Note: System will add $33.00 for Adhesive Spray - Super Trim 3M Adhesive (19oz.), if Selected.
One can of 3M Adhesive is Enough Glue to Install Entire Headliner.
SHIPPING NOTE: When new Headliner arrives, un-roll and allow material to relax at room temperature or in the sun before installing. This will allow any wrinkles in the material to relax. Do not leave Headliner rolled as shipped or wrinkles will set in permanently over time. Thanks
Currently Not Available, Out of Stock
$271.82
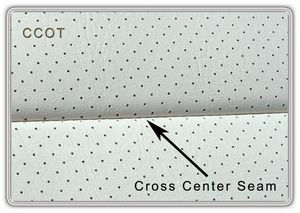
See Perforated Headliner Center Seam

$35.73

Remove Old Headliner

To reduce water leaks ~ it's a good idea to CAULK the back side of front hardtop visor before installing new headliner... Smooth / level caulk bead with finger...
Use 3M Fast 'N Firm Seam Sealer, Click for Page

Glue in New Headliner
Note: Old Style Headliner Shown.
Same Installation steps apply to New Perforated Headliner.
Install new headliner from center and work outward
Glue in headliner in 2 sections; front half & rear half
Spray adhesive on hardtop and on headliner foam backing
Allow adhesive to air dry approximately 30 seconds
Adhesive is now very tacky and will bond on "Contact"
From center, work headliner smooth outwardly
Do not apply too much adhesive or it will not bond
Same Installation steps apply to New Perforated Headliner.

Headliner Glued in Place
Note: Old Style Headliner Shown.
Same Installation steps apply to New Perforated Headliner.
Headliner Glues in Place
Old Velour Headliner Shown
New Perforated Headliner Not Shown but Installs the Same
Same Installation steps apply to New Perforated Headliner.

Headliner Trimmed to Fit
Note: Old Style Headliner Shown.
Same Installation steps apply to New Perforated Headliner.
CCOT's Perforated Headliner is Cut Slightly oversized to allow forgivness in case you install Headliner a little off center.
If we cut headliner to exact top size, then 9 out of 10 installations would be short on one side.
CCOT knows to make Headliners slightly oversized because we've installed hundreds of these headliners and the forgiveness of a slightly oversized Headliner is a must.
With razor blade trim away excess material.
Trim excess material away like overhanging pie crust.
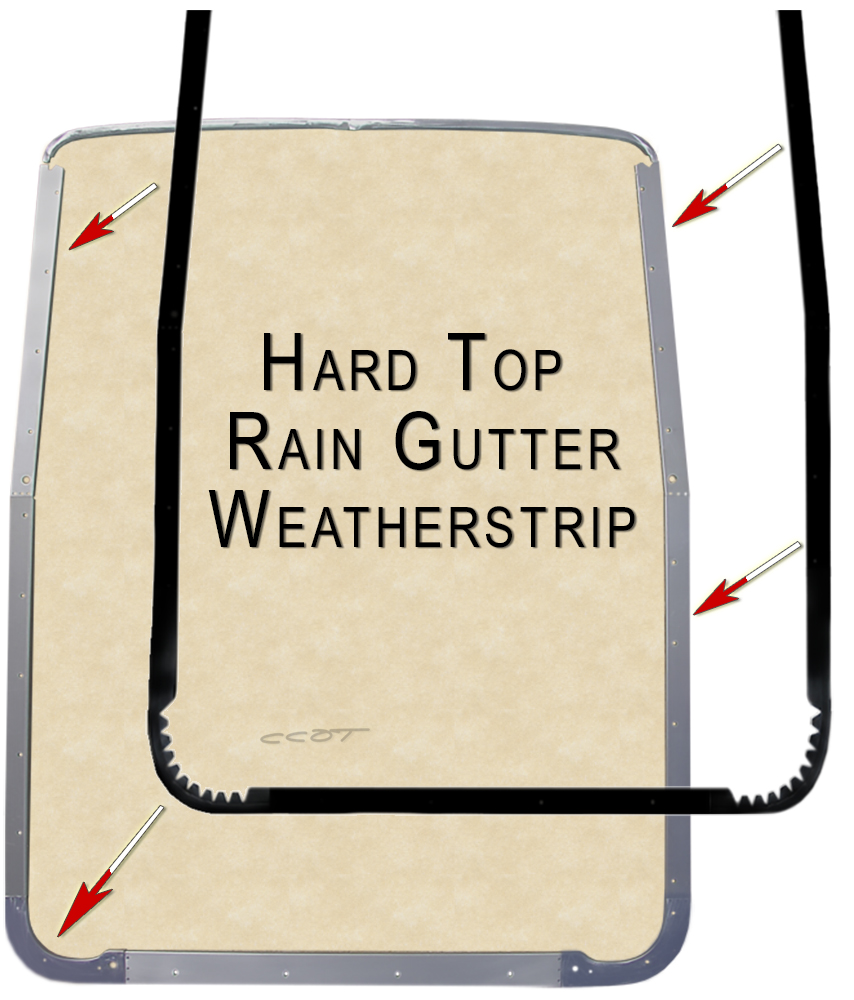
- Weather-Strip (W/S) Installation Instructions.
- Turn Hard Top (HT) upside down.
Clean rain gutter free of debris.
Lay W/S down on rain gutter w/beads to outside.
Shark teeth cut to form HT corners.
Position W/S bead just touching the inside of rain gutter rivets.
Glue to seal W/S in place with 3M Glue Prt# 3M08011
How to Glue Weather-Strip: Unroll W/S flat. Apply glue in short sections. Eventually, you'll run a continuous bead of glue the full length of W/S with extra bead (2 beads) at each Shark toothed corner. Glue holds W/S in place and seal W/S when HT is installed.
When gluing W/S, glue and work short sections at a time. Apply THIN layer of glue on BOTH the W/S and rain gutter. Allow glue to air dry about 1 minute before bonding surfaces together.
 |
$113.88

Temporarily out of stock ~ not available
$436.47
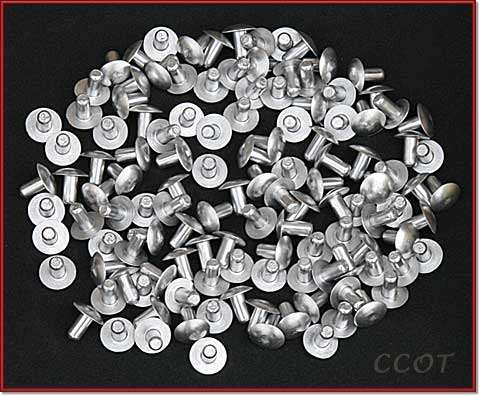

Simple Hard Top to Rain Gutter Rivet Installation: See Installation image
Use common rods (rebar) with flat square ends to install soft rivets that attach the rain gutter to the fiberglass top.
The floor rod backs up the rivet from the bottom side and the top drive rod hammers down on the rivets mushroom head causing the soft rivet to bell out against the flat surface of the bottom rod. It would be helpful to have a 2nd man hold the bottom floor rod in place while you hold the upper drive rod and hammer down on the rivet head.
$11.35

Rain Gutter Rivet Installation
Simple Hard Top to Rain Gutter Rivet Installation: Use common rods (rebar) with flat square ends to install rivets that attach the rain gutter to the fiberglass top.
The bottom floor rod backs up the rivet from the bottom side and the top drive rod hammers down on the rivets mushroom head causing the rivet to bell out against the flat surface of the bottom rod. It would be helpful to had a 2nd man hold the bottom floor rod in place while you hold the upper drive rod and hammer the rivit head.
The bottom floor rod backs up the rivet from the bottom side and the top drive rod hammers down on the rivets mushroom head causing the rivet to bell out against the flat surface of the bottom rod. It would be helpful to had a 2nd man hold the bottom floor rod in place while you hold the upper drive rod and hammer the rivit head.

